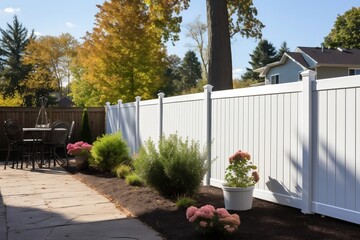
Vinyl Fence Installation offers security and style to your home or business. They are easy to install and require little maintenance.

Before beginning your project, check deeds for easements and local zoning laws to make sure you can build your fence. This step will also help you determine how much your fence will cost.
Regardless of whether you’re installing a wood or vinyl fence, proper installation is critical. Fences that are not installed correctly can easily be damaged and ripped out by wind or even a simple rainstorm. One of the key steps to a successful install is digging the post holes. Using a post-hole digger or power auger is recommended to save time and effort. This can be rented from many equipment rental companies in your area for about a day’s worth of work.
First, you’ll want to accurately mark the location of your posts, including property lines and any other restrictions on the area. A string line is a great tool for this job, so be sure to use one and stretch it taut from the corners of your fence’s perimeter to each end. If you’re installing a gate, make sure the stakes touch this string line as well.
Once you have the locations marked, dig your posts’ holes with a post-hole digger or a power auger. Typically, the depth of your post holes should be 1/3 of the post lengths. Depending on the soil conditions, it’s also recommended to dig your posts at least 6 inches deeper than needed to help with gravel backfill.
Before you begin digging, it is very important to call your local utility digger’s hotline to have any underground lines marked. Hitting a line while digging can cause expensive damage to your property and even injury or death to you or someone else.
Set Posts
Although vinyl is more durable than wood, it can be damaged by miscalculated hammer swings. Likewise, poorly set posts can create stability problems and shorten the lifespan of the fence.
To avoid this problem, stake out the intended fence line using landscape stakes. After that, tie a string line between each post to determine the proper spacing. Use this string to set the end and corner posts first, then follow it to install the rest of the posts. This technique eliminates the guesswork that often goes into installing fence posts and ensures the vinyl panels fit correctly.
Once you dig the holes, pour in gravel or concrete to add support. For 7’ and 8’ tall vinyl fences, most manufacturers recommend reinforcing corner, end and gate posts with metal inserts or rebar instead of concrete. This adds strength to the fence and helps prevent the deterioration that can occur with traditional concrete.
While it may seem counterintuitive to take a shortcut on the post installation, this step is critical to the final appearance and stability of the vinyl fence. If you skip this step, you could wind up with a wobbly or even collapsed fence. For this reason, it’s best to ask a friend or family member to help you out with the work, especially when pouring and setting posts in concrete. It’s also a good idea to keep a level handy to check each post for straightness.
Pour Concrete
For those who prefer a concrete fence foundation, a vinyl fence can be set in concrete. This option is popular in areas of extreme weather, like Utah, where frost can push concrete posts out of the ground. To install vinyl in concrete, use a concrete mount kit, which includes a form, gravel base, and all the necessary hardware.
Before digging any holes, call the local “Call Before You Dig” line for your area. This will ensure that you do not hit any underground utility lines and cause damage or injury to yourself or others.
Once your holes are dug, add 6 inches of gravel to each post hole before adding the concrete. This will help drain water and allow the posts to stand up straighter in the concrete.
While you pour your concrete, use a form to make sure that the base of the post is sloped away from the post. This will help prevent water from pooling around the posts and rotting them out.
As the concrete sets, check the posts with your level or a string line to make sure that they are plumb. It is much easier to fix a post that is off plumb early in the process than it is to try and correct an entire fence later after the concrete has fully set. Make sure to keep a level handy at every step of the process!
Attach Post Brackets
Just like a wood fence, a vinyl one needs concrete to hold the posts in place. Once the post holes are dug, pour concrete into each of them to form a concrete base. Be sure to stop the concrete about 6 inches below the ground surface so that you can add soil and grass in the future. Use a trough or shovel to shape the concrete at the base of each post so that it slopes down away from the fence and water does not pool there.
Next, install your line posts – the posts that are in between the end posts – according to the style of your vinyl fence and your property lines. Using landscape stakes, mark where the bottom of each line post should go, and then string a level string line from each corner to each of these locations to ensure that all lines are plumb.
You can also add a top rail tie to each of these posts if you want to make it easier for yourself and others to attach the bottom rail to them in the future. Once the top rail is attached, put on post caps to prevent debris and moisture from collecting in them.
It’s important to check with local building regulations and zoning laws before you start to build your fence, so that you can avoid any mistakes that could cost you money or lead to a lawsuit. Some communities require that you use a licensed contractor to build your fence and may have stricter requirements about the materials and height of your fence than other areas. You should also make sure to look at your deed to see if any easements exist on your land, as these can limit where you can put your vinyl fence.
Attach Post Caps
Once you’re confident that your fence posts, bottom rails and vinyl fence panels are level and fitted together correctly, install the top rail and post caps. Follow the manufacturer’s instructions for this part of the job to ensure everything is secure and looks great.
Unlike wood, vinyl does not need staining or painting. It does, however, need periodic cleaning with water and mild detergent to keep it looking pristine. You’ll also need to repair damaged areas on the vinyl as soon as they are noticed. This will help to prevent the problem from spreading to undamaged sections of the vinyl and can extend the life of your fence.
There are a few other important things to consider before beginning your vinyl fence project. First, make sure that you call your local “Call Before You Dig” line to identify any underground lines before digging any holes. This will help to prevent any damage or injuries during your fence building project.
Finally, if you’re installing picket finials on your vinyl fence, be sure to purchase extras in case they get knocked off by lawn mowers, baseballs or anything else. Having spares on hand will allow you to quickly and easily replace them when they are lost. This is a fast, easy and inexpensive way to give your vinyl fence a more finished look. This is especially true if you choose a color that contrasts with the surrounding landscape or house.
Install Panels
After you’ve set the posts, it’s time to install the fence panels. This is a fairly easy task that will likely remind you of those snap-together model kits from your childhood. However, you should follow the manufacturer’s instructions carefully.
Before you begin installing the panels, make sure that your yard has been cleared for your fence’s length and that it has been surveyed to ensure that you can comply with local building regulations. Also, check your deed to see if your property contains any easements. These are areas that another party (such as a utility company) has rights to, and they can impact where you’re able to put your fence.
If you’re planning on adding a gate to your vinyl fence, make sure that you have all of the necessary hardware. Typically, this includes hinges and latches. You might need to have these installed before you actually begin working on the gates or else they will not fit properly.
You should also have extra picket finials on hand, as these are glued to the top of the pickets and can be knocked off by baseballs, footballs, tennis balls, dogs, or even tree limbs. While they are relatively inexpensive to replace, it’s best to keep them handy just in case. Also, you should have a lock on your gate to prevent unauthorized access and robbery. These can be bought from most home improvement stores and are very easy to install.

